How to Create Levels for Grappling Hook?
0. Index
1. Start the Game2. Enable the Developer-Mode
3. Load a Level
4. Use the Console
4.1. Console Commands
5. Construction-Mode
5.1. Cubes
5.1.1. Creating a Cubes
5.1.2. Removing a Cubes
5.1.3. Changing the Gridsize
5.1.4. Converting Cubes
5.1.5. Hook Energy
5.1.6. Cube Color
5.1.7. Textures
5.1.8. Decals
5.2. Player-Start
6. Config-GUI
6.1. Setting the Level-ID
6.2. Changing Variables of Cubes
7. Animations
7.1. Animated Blocks
7.2. Animation-Mode
7.2.1. Creating Animations
7.2.2. Configuring Animations
7.2.3. Animating a Block
8. Integrating a New Level
8.1. Preview Screenshot
8.2. Metadata
9. Special Cubes
9.1. Type-Writer-Screens
9.1.1. Type-Writer-Script
9.2. Tutorial-Messages
9.3. Sound-Trigger
9.4. Buttons
10. Help
1. Start the Game
The level editor is part of the full game. You will be able to switch between the editor and the game with one key-hit.[TOP]
2. Enable the Developer-Mode
Go to the options-menu, when the game is loaded and set "Enable Developer-Mode" to "Yes".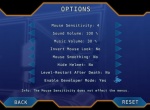
[TOP]
3. Load a Level
Load any level you like, with the select level menu.You will notice the text "Developer Mode" at the top of the screen, when it is enabled.
[TOP]
4. Use the Console
Hit "#" to open the console, type in "new" and hit enter, to create a new level. Close the console with "#".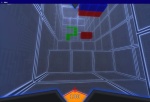
Now you have created your first level. It is one half of a big cube.
Every level in Grappling Hook is an octree.
When you split a cube into 8 equal smaller cubes, split some of them again, and remove some of the small cube, that is an octree.
It is not important, when you don't understand this now. You will later know it intentionally, while you worked with it.
But is important, that you know the limitations of this structure:
1. Every level as a limited size. You can not create anything outside of the octree.
2. You can not create cubes, that don't fit in the grid of the octree. You will see, that this is a big advantage in most cases, because creating a basic level can be just a couple of mouse-scrolls.
4.1. Console Commands:
new = Creates a new levelsaveUserLevel
saveUserLevel = Save the current level to a file that is named like the level-id. I will explain later, how to set the level-id.
loadUserLevel
givemeall = Give your character jump-boots and the grappling hook.
Note: Grappling Hook will never overwrite level-files. Instead it will rename the old files to "***timestamp_BACKUP". It is recommended to delete this backups from time to time.
The console has also a history. Use Arrow-Up and Arrow-Down select commands you previously entered, so you don't have to type them again.
Save your levels regulary, because there are a few operations may lead to a crash, when used in a way they were not intended.
[TOP]
5. Construction-Mode
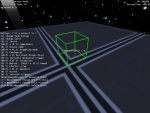
Press "F2" to enter the construction mode. You can fly around in construction mode, with WASD and look around with the mouse. Use SHIFT to fly fast.The game-time is stopped in construction-mode, so no animations will play.
On the left side of the screen is a list of most functions, the construction mode provides.
5.1. Cubes
You will notice a green cage at the mouse-cursor.5.1.1. Creating a Cubes
When you scroll up with your mouse-wheel, a new basic solid cube will be created, at the position of the green cage.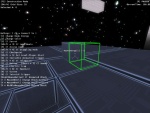
5.1.2. Removing a Cubes
When you scroll down with your mouse-wheel, a cube of the same size as the cage will be removed. The cube which will be removed depends on the cube you point at with the mouse-cursor.You will notice, that the game will automatically subdivide a big cube, when you cut a small cube out of it. Also the game will merge 8 smaller cubes into a bigger one, when it is possible.
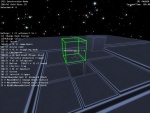
5.1.3. Changing the Gridsize
To change the size of cubes you want to create/remove, hold down SHIFT and use the mouse-wheel. The green-cage will change its size, to show you which grid-size is selected.5.1.4. Converting Cubes
Every cube you create or remove should be a solid cube. But you can convert solid cubes into other types of cubes by just hitting the right key and pointing on it.Have a look at list on the left side of the screen, to find out, which key is used for which block-type. "CT" means "Convert to".
Example: Look at a solid cube and hit "5". The solid cube will be replaced by a checkpoint.
5.1.5. Hook Energy
By default a solid cube has no hook energy, that means it can not be used with the grappling hook.Point at a cube and hit "1" to change the hook-energy. You can see the hook energy of a block above the mouse-cursor. Also the cube will now be displayed in green.
The possible values for the hook energy are:
"0" = no hook energy
"100" = limited hook energy
"-1" = unlimited hook energy
It is recommended to set the hook energy always to "0" or "-1".
In hard mode, the hook energy of every cube will be changed from "-1" to "100".
5.1.6. Cube Color
Beside the hook energy you can change the color of cubes. The color by the hook energy has always higher priority, than the normal color.To change the color of a cube, point at it and hit "2".
The possible colors are red, blue, black, and gray.
In the original levels red is always used to indicate targets, where you have to go to.
Blue is always used to indicate points, where you have to jump of or start.
5.1.7. Textures
To change the texture of blocks, hold "T", point at a cube and use the mouse-wheel.Transparent cubes will only be displayed transparent, after you reloaded the level.
5.1.8. Decals
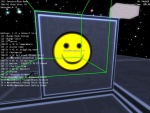
You can attach one decal to every cube.To do this use the middle-mouse-button to click on a cube. The decal will be placed at the point where you clicked on.
To change the type of the decal, point at the cube with the decal, hold down "Y" and use the mouse-wheel.
You can also change the size of a decal, by changing the editing-grid-size with SHIFT + mouse-wheel, and clicking again on the cube with the middle-mouse-button.
Hold "Y" and click with the middle-mouse-button on a block, to remove the decal.
5.2. Player-Start
Currently the player will start at the middle of the level, when he loads your level.To change this, enter the construction-mode, fly to the location where the player should start, and press SHIFT + 5. This position and camera-direction will now be loaded, when a player loads this level.
In the original levels there is always a checkpoint on top of a blue cube at the player start.
[TOP]
6. Config-GUI
The Conig-GUI is used to set the values of certain variables.Press "F5" to open it.
The Config-GUI has multiple pages. You can switch between them by pressing Arrow-Left and Arrow-Right.
On a page you can change the selected variable with Arrow-Up and Arrow-Down.
6.1. Setting the Level-ID
Go to the page "Level", select the variable "levelID" and type in the name of your level. Please don't use anything else than lower-case characters and numbers.Press ENTER to confirm the level id. When you now close the Config-GUI and type "saveUserLevel" in the console, this level will be saved in a file, named like the levelID.
6.2. Changing Variables of Cubes
With the Config-GUI you can change the values of single cubes. Select a cube with a left-click. A black cage will show up, at the borders of the selected block.Open the Config-GUIi and go to the page "Selected Block" to change the variables of the cube. Solid cubes have no variables, but sound-trigger, tutorial-messages, typewriter-screens, and checkpoints.
To deselect all cubes hit SPACE. Don't forget to deselect a block, especially when you are working with animated cubes.
[TOP]
7. Animations
Every level can have as many animations as you like.Animations consists of a various number of keyframes for a various number of animated blocks.
7.1. Animated Blocks
Convert a solid cube to an animated block with a right-click on it in Construction-Mode.An animated block can only be animated on a single axis.
The side, where you right-click on, will be the front of the block.
Hold down CTRL and use the mouse-wheel to change the length of a block.
Animated blocks can have hook energy, like solid blocks.
You can also attach decals to them and change their texture or color.
It is not recommended to change their texture, because of consistency with the original levels.
7.2. Animation-Mode
Press F3 to switch to animation mode.You can not create, remove or convert blocks in this mode.
The Animation-Mode is only used to animate animated blocks.
7.2.1. Creating Animations
Every level as a basic animation with the name "Base".Press INSERT on your keyboard, to create a new animation.
You can see the id of the current animation in the top-right.
Press Page-Up / Page-Down to switch the currently selected animation.
7.2.2. Configuring Animations
To change the attributes on an animation, open the Config-GUI with F5 and use the Arrow-Left/Arrow-Right to navigate to the page with the name "Current Animation".Animations have an id, length, priority, playback-speed, and can be looped.
You can also set for every animation, if it should play at the beginning.
When you create animations for buttons or type-writer-screens you want that the animations only play, when the player triggered them.
The id for an animation should be unique for the level.
You use the id, when you want to start or stop an animation.
Edit the values for the attributes as described in section 6.
7.2.3. Animating a Block
To animate an animated block you have to define keyframes for it.First you should set the animation time, with CTRL and the mouse-wheel.
The animation-time is displayed in to top-right.
You can change the step-size for the animation-time by golding down T and using the mouse-wheel.
When you point on a block and use the mouse-wheel, it will change the position and a new keyframe for the current animation-time will be created.
The animation-system will blend automatically between keyframes.
Change the grid-size with Shift and the mouse-wheel, when you want to change the amount a block should be moved.
The speed of a block is limited, to a number that is stable for the physics, but exceeding the speed will cause no errors.
[TOP]
8. Integrating a New Level
To finally integrate your new level, so that it shows up in the "Extra Levels" screen, you have to move the files "yourlevelname.lvl" and "yourlevelname.ani" into the "level/extra"-folder.8.1. Preview Screenshot
Every level needs a screenshot in PNG-format that has a format of 100x100 pixels. Move this picture also to the "level/extra"-folder and rename it to "yourlevelname.png". This picture will show up in the level selection list.8.2. Metadata
The last step is to create a file with some meta-data about the level.This is a normal text-file with the ending ".ld".
The metadata for the extra level "1_swing" looks like this, when you open it with a text-editor:
LevelName=Swing, Swing, Swing
AccessCodes=8
GiveBoots=true
GiveGrapplingHook=true
ChallengeTime=41
ChallengeHooks=6
ChallengeDeaths=0
ChallengeDamage=0
Hard_ChallengeTime=41
Hard_ChallengeHooks=6
Hard_ChallengeDeaths=0
Hard_ChallengeDamage=0
Music=6
AccessCodes=8
GiveBoots=true
GiveGrapplingHook=true
ChallengeTime=41
ChallengeHooks=6
ChallengeDeaths=0
ChallengeDamage=0
Hard_ChallengeTime=41
Hard_ChallengeHooks=6
Hard_ChallengeDeaths=0
Hard_ChallengeDamage=0
Music=6
"LevelName=" is the unlocalized level-name, that will show up in the menu and when a player loads the level.
"AccessCodes=" defines the number of access codes, that are required to activate the teleporter.
"GiveBoots=" defines, if the player should start this level with jump-boots.
"GiveGrapplingHook=" defines, if the player should start with the grappling hook.
"ChallengeTime=" is the time-challenge for this level in seconds in normal mode.
"ChallengeHooks=" is the used-hooks challenge for this level in normal mode.
"ChallengeDeaths=" is the deaths challenge in normal mode.
"ChallengeDamage=" is the damage challenge in normal mode.
"Hard_ChallengeTime=" is the time-challenge in seconds in hard mode.
"Hard_ChallengeHooks=" is the used-hooks challenge in hard mode.
"Hard_ChallengeDeaths=" is the deaths challenge in hard mode.
"Hard_ChallengeDamage=" is the damage challenge in hard mode.
"Music=" defines the background-music for the level. Valid values are 1,3,4,6, and 8.
The metadata-file should be named "yourlevelname.ld" and "yourlevelname" should be the levelID, which you can set with the Config-GUI ( see 6.1.).
When you have done all this, your level should show up in the "Extra Levels"-menu.
[TOP]
9. Special Cubes
9.1. Type-Writer-Screens
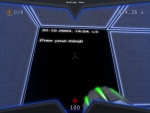
To create a type-writer-screen:
1. Enter the Construction-Mode
2. Convert a solid cube, by hitting "9"
3. Select it with left-click
4. Open the Config-GUI with "F5"
5. Go to the "Selected Block" page
6. Change the variable "actionScript" to a unique name, you will use for your script. Don't enter the ".sas" file-ending. It will be added automatically.
9.1.1 Type-Writer-Script
Let's first have a look at the script, that is used for the first screen in level 1.It is named "welcome.sas" and you can find it in the "level"-folder:
<NEXT>
TEXT=HEAD # #Welcome subj||<<<< DELAY=0
STOPANI=
PLAYANI=
<NEXT> TEXT=#To get back to earth you#just have to find the right#teleporter and activate it.|
DELAY=0
STOPANI=
PLAYANI=
<NEXT>
TEXT=#Don't get||<<<<<<<<
DELAY=0
STOPANI=
PLAYANI=levelstart"
This is an advanced script. At the beginning you may want to start with a script that is more simple and contains only one action.
TEXT=HEAD # #Welcome subj||<<<< DELAY=0
STOPANI=
PLAYANI=
<NEXT> TEXT=#To get back to earth you#just have to find the right#teleporter and activate it.|
DELAY=0
STOPANI=
PLAYANI=
<NEXT>
TEXT=#Don't get||<<<<<<<<
STOPANI=
PLAYANI=levelstart"
This is an advanced script. At the beginning you may want to start with a script that is more simple and contains only one action.
Meaning of every line:
"<NEXT>" defines the beginning of a new action. You can have as many actions in a script as you want. You can use this, to start/stop animations later. The actions will be executed one after another. Only one action is active per time.
"DELAY=" defines the time the screen should wait, till the next action will be executed.
"PLAYANI=" defines the animation, that should be played, when the action is executed by using the animation-id.
"STOPANI=" defines the animation, that should be stopped, when the action is executed by using the animation-id.
"TEXT=" is used to define, what will be displayed on the screen. This is not just simple text, but some symbols have special meanings.
Meanings of special symbols in text:
"HEAD" => Will be replaced by the current time, date, and level number.
"#" => Inserts a line-break.
"|" = Do nothing. Just wait a bit.
"<" = Erase the last char on the screen. This does not affect |, but can remove line-breaks.
9.2. Tutorial-Messages
To create a tutorial message, convert a solid block by pressing "0". Now select it with a left-click, open the Config-GUI with F5 and go with Left/Right to the page "Selected Block".Select the variable "message" with Up/Down and type in your tutorial message. Hit ENTER to save it. Close the Config-GUI with F5 and enter the game-mode with F1.
When you now touch the tutorial message, it will show up the text you have entered.
9.3. Sound-Trigger
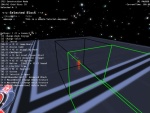
To create a sound-trigger, convert a solid block by pressing SHIFT+7. Now select it with a left-click, open the Config-GUI and go to the page "Selected Block".Select the variable "praiseSoundID" and enter one of the 4 valid values:
0 => "Good"
1 => "Great"
2 => "Terrific"
3 => "Incredible"
Hit ENTER to save it.
When you now touch the sound-trigger, it will play the sound.
The trigger will play the sound only once, but you can reset it, by entering the Construction-Mode and switching back to the game-mode.
9.4. Buttons
Enter Construction-Mode with F2 and press 7 to convert a solid cube into a button.Select the button with a left-click and open the Config-GUI with F5.
Go to the page "Selected Block" with Arrow-Left / Arrow-Right.
The trigger has five attributes.
"triggerOnce" = Should be possible to trigger the button more then once? When this is true, the button is only usable once and will stay red.
"enterPlayAni" = Which animation should be played, when the button is activated?
"enterStopAni" = Which animation should be stopped, when the button is activated?
"exitPlayAni" = Which animation should be played, when the button resets itself? You don't need for buttons, where "triggerOnce" is true, because they will stay activated.
"exitStopAni" = Which animation should be stopped, when the button resets itself? You don't need for buttons, where "triggerOnce" is true, because they will stay activated.
All values are optional. This means you can for example just enter the id of an animation for the attribute "enterPlayAni".
You can enter ids of animations, that do not exist.
When you trigger the button then, the system will create animations with that id.
[TOP]
10. Help
Please visit the forum, when you need more help.Questions and feedback are always appreciated.
[TOP]
